

The ultimate guide of hair extensions
How to apply clip-in extensions ?
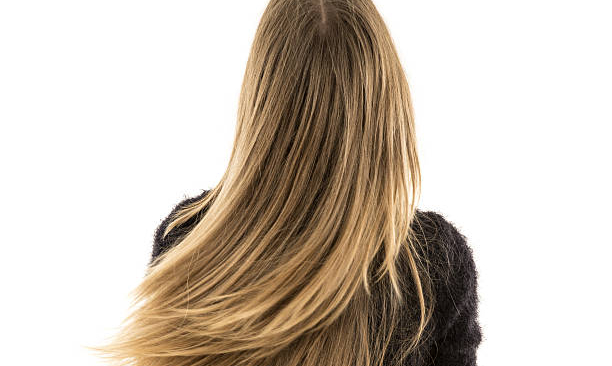
All women dream of having long, shiny, voluminous and silky hair. It has always been a symbol of femininity and seduction. Don't wait for years to have a mermaid mane, opt for the easy way with clip-in hair extensions.
Clip-in hair extensions, made of fiber or natural fibres, are essential accessories that allow you to change your hairstyle very easily and above all very quickly. They are easy to attach, so that you can style your hair as you wish and for any occasion.
The clips are made of metal and work on the same system as the click-clack clips, they open and close with a simple pressure of fingers.
They can be used to add length or volume to medium or long haircuts. Even on a plunging bob. It only takes a few minutes to place the clip-in extensions on your head and thus obtain a long and voluminous hair.
Natural hair extensions (which have not been chemically treated) can be styled like your own mane, and can be curled and straightened as you wish.
However, it is advisable to protect them with a thermo-protective treatment to avoid premature wear due to heat. Synthetic fibres, on the other hand, cannot be straightened, waved or bleached.
To get started, choose them according to your base colour and then the desired length. Then get a Tangle Teezer type brush, your highlighting strips and a few minutes of your time.
An application diagram is usually included on the packaging.
Clip-in extensions application tutorial
Find below the instructions for the installation of clip-in extensions:
Step 1
Brush your entire head to untangle the knots and make a parting from ear to ear with your fingers or a tail comb, slightly in the shape of a "U" to follow the layout of your natural layout. Then tie the top part with a crab clip to hold them in place.
Step 2
Open the clips of the first strip and start by attaching the one at the end of the strip, at the roots. Then close the other clips on the strip, making sure that it is straight. Be careful not to let your band form waves, so make sure to press them down to the roots.
Step 3
If you have short, fine hair with no volume, you can crimp the hair at the roots and put a little hairspray on the metal clips to help them hold. Once the first clips are in place, check that they stick to the rest of your hair.
Step 4
Then repeat the process until you have used up the number of strips to be applied. Our advice: to facilitate the installation of the extensions, start with the bottom of the head towards the top. The larger strips are dedicated to providing the middle of the head, and the smaller strands for the side of the head.
Step 5
Finally, even out the look by styling your mid-length hair, once all the extensions have been applied, either with your fingers or a comb. To avoid any demarcation effect, you can choose to straighten or curl your hair as you wish. Our favourite model is the set of 8 clip-on strips.
Don't stop there, go to this page to learn everything about hair extensions: how to choose them, how to maintain them.
How to apply micro ring hair extensions ?
To go from short to long in only a few hours, it is now possible thanks to hair extensions!
To transform yourself in a flash and show off ultra-glamorous lengths, there is now a system of attachment that is completely safe for your mane: the technique of micro ring hair extensions or, in other words, rings.
Some of you may be a little reluctant to use this method, but rest assured that if you entrust your head to a professional you will be more than satisfied with the result. It is a mechanical process that requires a minimum of practice and precision, so it should be done in a hair salon.
It is quite tedious to do on your own, especially on the back of the head, so you will need to call in a hairdresser, or someone who has already practised this method.
In general, it takes one to two hours to apply the extensions, which is relatively long but worth it because you can keep them for 4 to 5 months depending on the care you take and the quality of your hair. Now you can choose cold tie and dye extensions for a successful ombré-hair!
Loops are ready-made Remy Hair micro ring extensions with a metal clip and a transparent loop that are already attached to the hair strand. This makes them even easier to insert than the traditional method, which requires the use of a hair puller. Here are some tips on how to properly insert your loops.
The micro loop hair extensions setting technique
Here is the tutorial for micro loop hair extensions, with ready-to-use rings (also called easy loops extensions). Here is the material you need to put in these extensions.
One or more packs of natural hair, a brush, a tail comb, a crab clip, a crush clip.
They are easier to apply than classic micro ring hair extensions, so you don't need a plier or small rings to insert.
It is important to know that they are applied in lines. You need about 3 lines spaced apart for a half head and 4 to 5 lines for a full head.
- Brush your mane well and separate horizontally across your head with a tail comb. Secure the top part of your hair with a crab clip to hold it in place on the top of your pretty head.
The first line you make should be positioned about 2 cm above the nape of your neck.
- Prepare your hair strands and your crimping tool so that you have them ready for the next step.
- Using your tail comb, take a small strand of hair, the same thickness as your strip of hair and then insert the clear loop into your strand.
- Then slide the ring towards your skull so that it is about 1 cm from the roots and gently pull the loop until it is completely removed. At this point, your strand should slide through the ring on its own. Be careful not to cut the end of the wick, otherwise it may no longer fit in the ring and would therefore be unusable.
- Then take your crushing pliers and flatten the metal ring once the wick is correctly positioned. Note that the space between two applied wicks should be the same size as a wick (about 1/2 centimetre). Proceed in the same way to the end of each of the lines drawn.
- After the application, your hairdresser will have to shape your new hair and adjust the length of your tips, so that your extensions blend in perfectly.
As for the application, the removal of micro loop extensions is done with a crushing tool, but only on dry hair. To do this, simply crush one by one the different fixing rings with the crushing pliers, they will open automatically and unfortunately of course they will not be reusable.
Then gently pull the strand out, you can now wash your hair. Usually if you have your cold extensions applied by a hairdresser, the package also includes the removal of these. They are safer for your mane and easier to remove than keratin extensions.
You should know that there are also adhesive extensions in the form of strips to be stuck into the hair. You can fix them at home without having to go to your hairdresser.
The installation of pre bonded hair extensions
Pre bonded hair extensions are quite different from micro rings hair extensions (otherwise known as rings) or clip-in extensions. You will obtain a very natural result as long as you use the same colour as your hair, or a different shade if you wish to create an ombré hair or highlighted effect.
In order not to make a mistake when choosing your hot packs, don't hesitate to ask for advice from a specialist shop or your hairdresser. In this article we answer all the questions you may have about this type of hair extensions.
How to choose your pre bonded hair extensions ?
Keratin strands are generally made of high quality natural fibers, grouped in bundles of strands with a keratin dot. These strands are glued together with tweezers that melt the keratin, about 1 cm from the root and without risk to your scalp.
After the installation, the glue points remain completely invisible and the strands will remain fixed on your mane for several months.
Before making your purchase, find out where the strands come from, so as not to be unpleasantly surprised by the quality of the strands. Natural keratin extensions are more expensive than their synthetic versions. The opinions of merchants can help you decide, and the before and after on social networks will give you a precise idea of the competence of the professional.
How many strands should I use ?
The number of strands used will depend entirely on your hair mass. To obtain a substantial volume, you should count on average 120 to 160 strands to achieve a complete head. According to our clients' opinions, it is better to plan for more strands, even if you don't use them all, so that you can keep them for a future application.
There are several weights of strands, from 0.5 grams per pack of 20 strands to 1 grams, the thicker your strands the bigger the budget.
The time required to apply the hair will vary according to the number of strands your hairdresser decides to apply. It is necessary to count between 3 and 4 hours for a correctly done job. It is strongly advised not to start this operation without the help of someone who has received training in the installation of hair extensions.
It also requires specific equipment such as a wick separator, iron and heat tongs. Unlike clip-in extensions, the hot setting technique requires some expertise.
How long can I keep pre bonded extensions ?
If you take good care of your pre bonded extensions with the right care, they can last between 4 and 6 months. As soon as they are damaged, you will have to return to your hairdresser to have them removed. If you wish to put them back in, a hair assessment by a professional is essential, as he or she will be able to judge the condition of your hair and therefore its capacity to withstand successive applications.
We still advise our clients to let the hair recover for 2 to 3 weeks before a new application. It is important to know that with this type of addition, the risk of allergy is never zero. If you feel itching several days after the installation, consult your doctor and in the worst case, have your extensions removed quickly.
Pre bonded hair extensions: price, opinion ?
This type of extensions are suitable for all girls who wish to lengthen their mane over time. It requires a length of at least 10 good centimetres, so that the fixation points are completely camouflaged by the rest of the hairstyle. The strands are set in the mass about 1 cm from the root. If they are too long, your hairdresser will be able to adjust them once they are in place, so they will blend in better.
The price of pre bonded hair extensions is still high for a hair salon, but it is better to pay the price than to have a botched result.
In general, if your hair is fine and fragile, it is better to avoid putting in too heavy strands that will pull on your hair at the risk of damaging your scalp. Worse, it could break when you have it removed.
It is better to play it safe if your hair is fine, you can consider increasing the volume but always sparingly or opt for clip-in extensions.
How do I maintain my pre bonded hair extensions ?
When you wash your head, you should never tilt it downwards, as this can cause tangles. To shampoo, place your hair upside down and use a shampoo that is silicone-free and free of harsh sulfates.
As a treatment, apply a repairing balm or conditioner once or twice a week to detangle, nourish and deeply protect your hair.
To dry, don't twist your hair in your towel, gently pat it dry with your usual dryer to remove excess water. You can blow-dry or straighten your hair with a blow-dryer, but don't run it over the hold points, as this can melt the keratin and break your equipment.
Don't overdo the heat, your hair prefers moderate temperatures. Don't forget to use a heat protection spray to protect your hair from the heat.
How to style pre bonded hair extensions ?
Your new mane requires special attention because these pre bonded hair extensions tend to tangle too easily. Therefore, brush your hair gently, at least 2 to 3 times a day, to remove the knots, insisting on the keratin points. It is recommended to comb with a specific brush with two levels of spikes or with soft bristles.
You can achieve any type of hairstyle, raised in a ponytail, in a bun, braided. As long as you don't let the fixation points show. If you want to sleep at night, braid your hair, as the friction of the cushion could cause knots. If you are swimming or going to the beach in the summer, tie your hair up as salt or chlorine is not the best friend for keratin extensions.
How do I remove pre bonded hair extensions ?
If you are wondering how to remove pre bonded hair extensions, your hairdresser will use a specific solvent to dissolve the attachment point. This specific solvent will dissolve the keratin, releasing the strands one by one. Then, using a pair of flat tongs, the hairdresser will break the glue point into pieces.
This technical gesture must be taken with care. It is necessary to be precise in the gesture so as not to damage the hair strands, at the risk of ending up with less hair mass. Once the pre bonded hair extensions have been removed, all you have to do is apply a special treatment to nourish your hair in depth.


Leave a Comment Cancel Reply